It’s National Sneak Some Zucchini onto Your Neighbor’s Porch Day!

Honest to goodness!

I left a fresh-picked cucumber on my neighbor’s patio last night. Today, after coming home from running some errands, my neighbor’s grown daughter was out back playing with their dog.

“Hey, Clarissa! Did you get the cucumber I left for you guys?” I asked.

She looked at me kind of funny as she said yes, thanks. “Did you know it’s National Give your neighbor some zucchini day?” she asked, thinking that was why I left the cuc.

“You’re kidding, right?” I laughed out loud at the appropriateness of such a holiday. For backyard gardeners  in zone 4/5 areas,  this is the time of the season when most of us have zucchini coming out of our ears! You can’t GIVE it away! And really, how much zucchini bread can a person eat?

After exchanging pleasantries with my neighbor I went inside and immediately googled this funny-sounding holiday. You know what? It’s even better than I thought!

It’s actually called National Sneak Some Zucchini onto Your Neighbor’s Porch Day! and a couple of the sites I found say the ritual actually consists of stealing over to your neighbor’s porch or patio under the cover of NIGHT and leaving all the zucchini you can get away with, including the ones that grew way too large and aren’t good for much other than as a receptacle for cucumber dip, or something like that. The following AllRecipes.com link provides the back story about how this holiday came to be AND a recipe for zucchini chocolate cake! Sounds yummy! http://budurl.com/zucchini

Best Laid Plans…

Hey. I know, it’s been awhile.

So, my patch is 90% planted: A few tomato plants I bought from Fleet Farm, peppers and broccoli are in. Beans and cucs are coming up, carrots are still germinating. Nasturtiums (I actually pulled out the ol’ nail file and filed the seeds like the packet suggests) are poking up through the newly tilled sand/dirt. Looks like most of the marigolds will survive.

And then the zone 4 western Wisconsin weather turned cold. We got much-needed rain, but my cucumbers, a compact bushy variety I’ve had great success with for the last three years, which sprouted more than two weeks ago, have yet to get their first set of true leaves!

My boss at the paper I work for says she hasn’t planted her corn yet, ’cause at the price of her organic seeds, she can’t afford them to not germinate and the soil’s been too cold!

But it’s mid-June! My stubby little tomato and pepper plants have a lot of catching up to do–if they make it at all.

Today is sunny and mid-70s; it’s supposed to hit mid-80s by Monday. But, in the past three weeks there have been a few days that didn’t make it out of the 50s. *gulp*

Welcome to my zone 4 world. It’s a little different from the zone 5b heavy clay soil I’m used to. Good thing gardening is just one big experiment…and sometimes we can get away with do-overs.

How’s your garden growing?

Just Say ‘No’ to Miracle-Gro

OK, so I raised a fuss when I learned Miracle-Gro is on Twitter. Nevertheless, after a bout of grumbling I was willing to live and let live. But when I checked into my FarmerPhoebe Twitter account this afternoon, I actually had a message from my nemesis! They were assuring me that they have an “organic” product line, which should make everything OK. I responded. Several times. I told them…well, here; I made a copy of the entire exchange. Read for yourself. Sorry the image is blurry. You can also go to http://search.twitter.com, type in FarmerPhoebe. When you see text with both my picture and the Miracle-Gro logo, click on Show Conversation if you want to.

miraclegroconvo2

Refuge Farms: A Place of Everyday Miracles

Sandy Gilbert was in the driveway greeting volunteers with smiles and hugs as they arrived. It was a beautiful early spring day in western Wisconsin, not a cloud in the sky, the warm glow of the sun taking the chill off the breeze that always seems to blow up on the hill—sometimes fiercely, Sandy said.

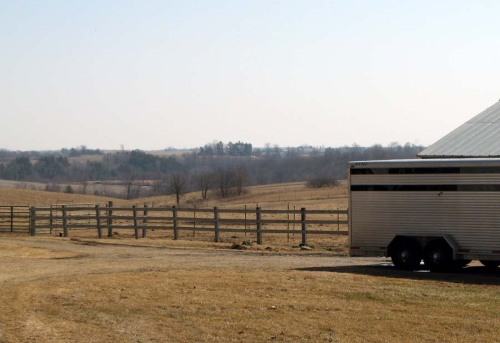
This photo does not do justice to the beauty of western Wisconsin farm country.

This photo does not do justice to the beauty of western Wisconsin farm country.

“Be sure to dress in layers,” she told me earlier that week, adding that the wind can cut through you.

Not on that picture-perfect Saturday afternoon, however. From the moment I stepped out of my car onto the gravel drive until I said my goodbyes several hours later, I basked in the warmth of not only the sunny day, but also the warmth and caring that seemed to seep out of Sandy’s pores—especially when she’s around the horses.

I Went for the Horses

The horses. That’s why I was there, to spend time with the horses. In fact, horses are why I pulled up stakes, packed my car, and made the journey from Chicago to these beautiful rolling hills. I hope to someday buy a little piece of land with a house, barn, and fenced pastures where I can stable a couple of horses, adopt rescue dogs and tend a little organic garden.

But that’s down the road a ways. In the meantime, when I heard about Refuge Farms, I knew it was a program I wanted to be involved in. Sandy rescues horses from any manner of neglect and abuse, trailers them to Refuge Farms, provides them a safe haven while healing their hurts, and helps to restore their trust in humans while giving them back their dignity. In some cases, she adopts them out to forever homes; in other cases, she promises them a safe place to live out the rest of their days. She adopted her first horse in 1978 and set up the sanctuary in 1993.

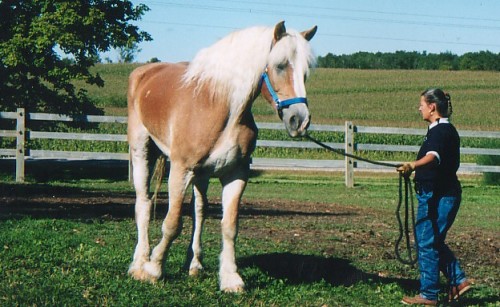
Sandy with one of her rescue horses - all  20 hands of him!

Sandy with one of her rescue horses - all 20 hands of him!

The day I visited, Refuge Farms was home to 18 horses, a friendly chocolate lab rescue dog named Little Man, and at least three cats. After attending a volunteer meeting, I high-tailed it to the barn and helped Sandy bring in a quiet sorrel gelding from the paddock so another volunteer and I could brush out his winter coat and de-tangle his tail, which was a solid mass of burrs from end to end.

One Sad Story Among Many

It was love at first sight. The Old Coot, as he is affectionately called, was a fairly recent rescue. The story I heard from Pam Wiltz, one of the volunteers I worked with, was that The Coot and another old horse had been left behind last August when the family moved away. They were abandoned in a barren pasture with no access to water. Sandy found out about him and picked him up in February. Left to forage on their own for almost 6 months and during an especially brutal winter, The Old Coot’s pasture-mate had succumbed to the harsh conditions and lack of food and adequate water by the time Sandy got there.

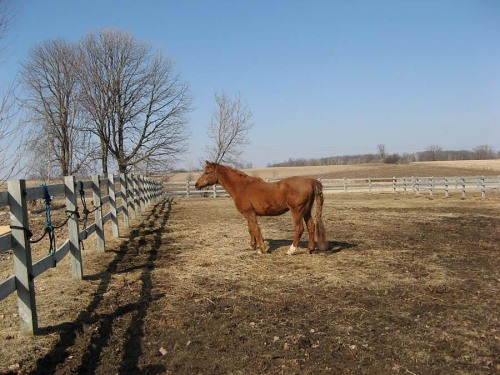
It's hard to believe this beautiful animal was abandoned in a field just before winter to starve to death.

It's hard to believe this beautiful animal was abandoned in a field just before winter to starve to death.

The Old Coot was underweight when he arrived at the farm, Sandy said. As with all her rescues, a vet came out to the farm to give him a physical, de-worm him, and fix whatever might have been physically wrong with him. Pam told me his teeth were floated, which, for non-horse people, means they are filed down so the animal can chew comfortably and to prevent the horse from getting sores inside of its mouth. It was during this procedure that the vet estimated The Old Coot to be between 25 and 30 years old. (Sandy found out later from the owner that he was actually 32!)

Then the farrier came to trim his overgrown hooves. There’s a story on the Refuge Farms Web site about a horse named Sweet Lady Grey who was brought in totally mistrustful of people and with feet so neglected, the poor animal’s hooves had grown over and around the horseshoes on her front feet. The farrier discovered them after carefully whittling away at one of her grossly overgrown front hooves with a hoof knife, because he couldn’t cut them with the clippers. The Old Coot’s feet were in fairly bad shape, but not nearly as bad as Lady Grey’s.

A Day at ‘The Spa’ for The Old Coot

By the time I showed up on horse-brushing day, The Old Coot had put on weight and lost the distended malnourishment belly. He was a perfect gentleman the entire time we worked on him. We spent a good couple of hours brushing, stroking and talking to The Coot. You could tell he reveled in the attention—even though someone was pulling at his tail almost the entire time to get the burrs out.

You only have to look in a horse’s eyes once to know they have a soul. When The Coot and I gazed at each other, I saw a creature that had finally come home after a long, rough journey. Hearing his story reminded me of the childhood classic Black Beauty. After bouncing around from owner to owner, enduring abuse and neglect from careless, ignorant, and sometimes mean, people for many years, Beauty found his way back into the life of a man who knew Beauty when the horse was young and vigorous. He was a good, kind man who put the old horse out to pasture to spend his remaining days in peace, cared for and knowing he was loved.

Sandy’s Promises to Her ‘Kids’

That’s what The Old Coot reminded me of. It made me tear up to think of this calm, beautiful animal with deep brown eyes left to starve to death in the cold. Spending the afternoon with Sandy’s animals really brought it home for me how important her work is. She provides the space, care, time and love for the lost, abandoned, often less-than-perfect animals that find their way ‘home’ to Refuge Farms. Before leaving that afternoon, I told Sandy repeatedly I wanted to help in any way I could to realize Refuge Farms’ mission, three promises she makes to every animal that comes under her care.

  1. There will be no more beatings, electricity, use of performance enhancing drugs, hollering, or any other type of inhumane treatment. There will be plenty of respect.
  2. There will be no more hunger. There will always be food and water available.
  3. There will be no more moving to another farm, fighting for a place in a new herd, or getting used to another routine or the taste of other water. This is home. Forever. Even in death you will not leave THE FARM.

For more than 15 years Sandy has dedicated her life to helping those who cannot help themselves.

The Old Coot Feels Like a New Horse!

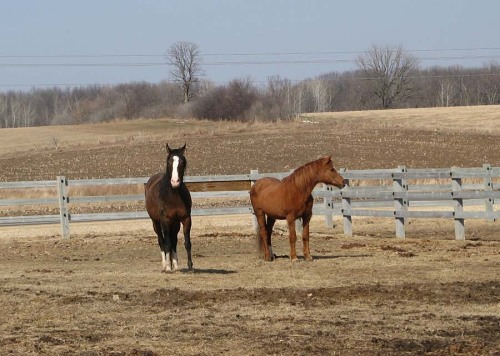
The Old Coot and Angel Pose for Their Calendar Shot!

The Old Coot and Angel Pose for Their Calendar Shot!

I could tell The Coot was tired of being groomed and wanted to return to the paddock and to his buddy, Angel, a beautiful Arab mare given up by her humans to make room for younger horses. So, I unhooked The Old Coot and led him outside; one of the other volunteers opened the gate and kept the other horse from getting out of the paddock.

After I took off The Coot’s halter inside the paddock, the most amazing thing happened. That Old Coot literally kicked up his heels and started tearing around the corral like a colt! I was safely outside the gate when he came to a screeching halt right in front of me. He looked at me with a knowing eye and, like a horse half his age, spun around, did a little half kick with his rear legs and took off again at a dead gallop around the paddock, once again careening to a stop within 10 feet from where we were standing.

Everyday Miracles at Refuge Farms

While The Coot was displaying his hard-won exuberance, I heard a whoop from near the house. Sandy was chatting with a group of visitors and saw the whole thing. The Old Coot was recovered. Yet again, Sandy had taken an animal near death and nursed him back to health to where he could love life again! I was laughing while tears streaked down my cheeks, watching The Old Coot come to realize he was feeling like himself again. Sandy writes on her Web site about the magic that happens at Refuge Farms and I knew in that moment I had the privilege of getting a little glimpse of just what she was talking about.

I walked back to the barn with a warm glow and helped brush a couple of other horses and talked to some of the volunteers. I heard horrific stories about where some of these animals had come from. I found it hard to believe that these calm, quiet, majestic beasts that were the picture of good health had come from such horrible places and circumstances. Some were more damaged than others and it is clear from the stories on the Refuge Farms’ Web site that it took some members of the herd longer than others to heal. But in the end, they healed as best they could and had Sandy – and the generous donations of others – to thank for it.

All in all, it was an amazing afternoon. I knew I would be back. I suspect Refuge Farms will become my new church; I could definitely feel a strong Presence the entire time I was there.

With the calamity going on in the world today, if you ever lose faith or begin to doubt that miracles happen, spend an afternoon at Refuge Farms in Spring Valley, WI, and I guarantee any doubt will be removed forever.

Note: For more information about the amazing work Sandy Gilbert and an army of volunteers do at Refuge Farms, go to their Web site: refugefarms.org. You can help too! See the “Calling All Gardeners” sidebar at the top of this page. If you buy spring bulbs before April 30, 45 percent to 50 percent of your purchase goes directly to Refuge Farms! They’ve made it as easy as possible to purchase beautiful flowers for your garden while helping a great organization do good work. Download the flyers and order forms and get them in to Refuge Farms before April 30. On behalf of Sandy and the Herd, thank you for your support.

How to Start Growing Your Veggies from Scratch

I’ve been feeling so guilty about neglecting my blog I asked my friend Elizabeth to be a guest blogger. Being the wonderful person she is, she stepped up. Elizabeth has been gardening organically for years, runs a health and wellness business, is a published author and is starting a small market garden this year.

4 Seed-Starting Tips to Help You Grow Your Own

By Elizabeth Eckert

This week marks the “official” beginning of spring. In this gardener’s household, that means one thing. Seed starting. It’s a ritual I look forward to with much enthusiasm. Green and growing things! Oh boy! Perhaps you feel the same way. And yet…

There are the inevitable questions. Let’s consider several of the most common seed-starting questions and explore some possible solutions. Ultimately, you’ll find your own “best” ways.

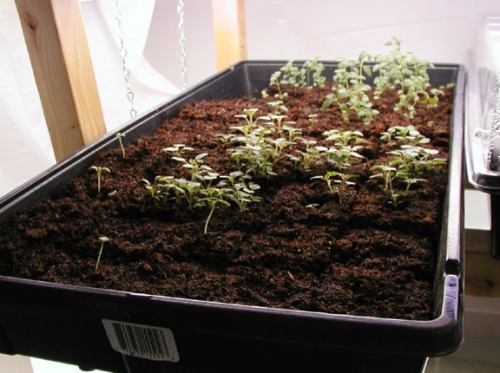
  1. When do I get started? Count back from when you expect to put your wee little transplants into the ground. Your local extension service should be able to provide an “average” last date of frost. Where I live, that date is May 21. Use the “average” date as a guideline and watch your local weather forecast!Check your seed packet or gardening reference for specifics on how many weeks ahead of transplanting to start a particular plant. I usually figure about 10 weeks for onions and herbs; 8 weeks for tomatoes, peppers, and eggplants; and 4 weeks for any squash or cuke family plants slated for transplant. Onions, cabbages, and lettuce are tolerant of cool weather and can go out before the last expected frost date. Tomatoes, peppers, eggplants, and squashes will keel right over if exposed to freezing temps. Best to hold them back until conditions improve.Counting back from May 21, now is the time to start tomatoes, peppers, and eggplants! I’ve already plunked the first batch of tomato seeds into potting mixture. Due to some germination problems with peppers and eggplants last season, I’m running an experiment and sprouting those seeds prior to planting this year. Hopefully they’ll be ready to plant in soil by the coming weekend.
  2. What medium should I use for seed starting? This is somewhat a matter of personal preference. Some people use compost exclusively. It’s free, a big plus! If you want to go the compost route, you do need to plan ahead. In the fall before things freeze up, shovel up your compost into buckets or containers and make sure you can get to it when you need it. Another alternative is to buy a commercially prepared seed-starting mix. Most of the seed catalogs offer their own favorite mixes by the bagful. Bear in mind you’ll be paying to ship soil to your location from theirs, and soil tends to be heavy. You can also check with any garden centers in your area. If organic soil is important to you, be sure to ask questions. You do not need a chemically induced “miracle” in your potting soil. Seeds are little miracles all by themselves and will germinate in nearly any warm, moist environment.For my own seed starting, I usually create a custom mix in one of those big tubs. I start with Eliot Coleman’s recommendations (see his book The New Organic Grower) and temper it according to what’s available. The main ingredients are coir (coconut fiber) or peat moss, compost, and perlite or sand.
  3. What kind of containers do I start my seeds in? I’ve tried any number of options — from little troughs to peat pots to recycled yogurt containers. Over the years, I’ve acquired a whole stack of lightweight plastic flats to use as trays. I now use these as the collector of smaller vessels, employing one of two different strategies.

lettuceincups31809cropped

For ease of transplanting onions and herbs, I like to use soil blocks “straight up” with no container. Just place them directly in the trays. You do need a soil blocker tool to make them; I was lucky enough to get one for the holidays last year. Eliot Coleman’s soil mixture is great for making blocks — being high in coir or peat moss, it holds together well.

herbsinsoilblocks31809cropped

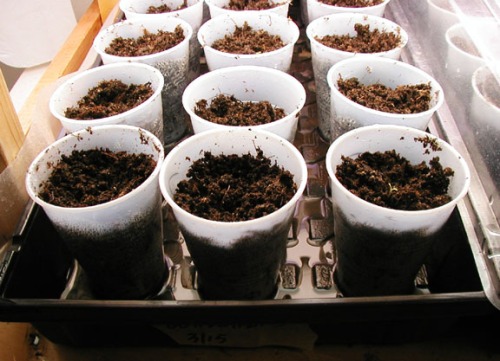
For most everything else, I use 5 oz or 7 oz clear plastic cups. Poke drainage holes in the bottoms with a hot nail. (Hold it with a pair of pliers, then heat over a candle.) Add damp seed-starting mixture, and then pop in the seed! When the plant gets too large for the container — in the clear container you can see the roots reaching out — then pot it up to something larger. Larger cups may work, or pot up into re-usable plastic pots, cut-off half-gallon milk containers, or large yogurt or cottage cheese containers. Just remember the drainage holes!

4. What about heat and light?

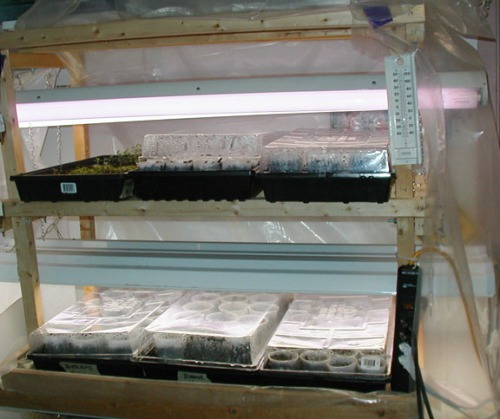
When I first started seed-starting, I lived in a small condo with just one sunny window. I also had two cats. Nonetheless, it was possible. Using a little ingenuity, I rigged a shelf that hung down from the curtain rod in front of the sunny window (out of reach of the cats) and placed the new starts on that. My space needs were modest at the time, because I only had a very small garden. Nonetheless, it filled the bill.These days, I start more seed. A couple of seasons ago, I made a two-shelf starting cabinet out of a bottom tray, a few pieces of 2 x 2 lumber and some ¼ inch bolts. Shop lights hang from the tops. Up to three flats can slide in on each of the two shelves. The whole contraption is covered with plastic to conserve heat and humidity. The starting cabinet sits on a table-top in my daylight basement.

seedstartingsetup31809croppedFluorescent lights on a 16-hour timer give off enough heat to increase the area above room temperature by 5–10 degrees—into a nearly ideal germination range. Once green starts to show, I remove the tray covers and let the seedlings keep growing until they’re too tall for the shelves. At that point, they rotate out to a different spot and something else takes over in the warm cabinet. The lights are not needed for germination. This solution won me over because of the warmth factor, and because it’s so easy to simply remove the tray covers and give the new plants their light.

There are other alternatives for providing a warm spot for seed germination. Some people like to place seed flats on top of the refrigerator, a reasonably warm spot in most homes. Another option is seedling heat mats. They do work, though they’re a bit expensive. I even know someone who puts an electric mattress cover on the bed in her guest room and places germination trays on that. While I can’t personally recommend that strategy, it is creative!

Bottom line is this: Seeds really want to grow. They need just a few things: a growing medium, moisture, and a little heat. Once they sprout, they also need light. As your plants continue to grow, you might add some fertilizer to their water every couple of weeks. (Fish fertilizer works great; keep in mind it is rather aromatic). Finally, give your inside starts an opportunity to harden off gradually in the outdoors before your final plant-out. They’ll thank you by thriving in their new home!

There’s nothing quite like the satisfaction of knowing you grew your lunch all the way from seed. Pleasant gardening and many happy tomatoes!

Elizabeth Eckert is a healthy living geek and organic vegetable gardener. Healthy living is easy with tips from her Healthy Living DIY blog.

Where to Find Non-GMO Seeds–And Other Resources

In case you haven’t ordered your seeds yet, here is a great resource to find companies that do not support the proliferation of genetically modified organisms: gene-watch.com/safeseed/sourcebook

The Safe Seed Pledge was launched in 1999 by the nonpartisan Council for Responsible Genetics and, according to the organizations Web site, is part of a larger project to educate people about the risks associated with widespread genetic engineering of our food supply.

The Safe Seed Pledge has been taken by more than 100 companies committed to ensuring that, to the best of their knowledge, the seeds they sell are non-GMO. The pledge states, in part:

“Agriculture and seeds provide the basis upon which our lives depend. We must protect this foundation as a safe and genetically stable source for future generations. For the benefit of all farmers, gardeners and consumers who want an alternative,

We pledge that we do not knowingly buy or sell genetically engineered seeds or plants.

CRG is a fascinating organization. Here’s another link about its intention by developing the Safe Seed Pledge: gene-watch.org/articles

Gardening Company Reviews on Dave’s Garden

While researching a question posed to me on Twitter about a particular seed company, I stumbled across a handy, free, reader-generated review page on  DavesGarden.com:

DavesGarden.com/products/gwd

More than 6,600 mail-order gardening companies are listed here. Readers are encouraged to review their faves–and not-so faves. There is a Top 30 list (companies with the most positive reviews in the database) and the section is easy to navigate. Beware of the banner ad at the top of the page, however. It’s activated by just hovering over it and it will not close no matter how many times you click the close button at the top right corner. All in all, a minor inconvenience for a great resource.

My Favorite Gardening Forum

I’ve been a member of the Organic Gardening magazine Gardener to Gardener forum for 7 years and there is not a more helpful group of knowledgeable organic gardeners on the planet, IMHO. Introduce yourself in Club OG, post your questions in Over the Fence or New Gardeners forum and you are likely to get a reply within a couple of hours. But BEFORE you post, try the search feature first. Type your keyword or question in the Find box and you may get pages and pages of information–and a few humorous posts, as well.

How Twitter Helped Me Find a New Caretaker for My Beloved Garden Patch

I recently moved from Chicago to a little town in western Wisconsin. There are still several inches of fresh snow on the ground up here, but my yearning for spring is alive and well. And I’m missing my little garden patch.

Gardening with Nuns

Having been an apartment dweller for the past umpteen years, I got my gardening fix through community gardening. My most recent patch was behind a Catholic girls high school in Chicago. (It was an endless source of amusement to me that I, a one-time out-of-control juvenile delinquent was now gardening among nuns.) The nuns, particularly Sister Mary Alice, were a hoot. Their flower gardens are beautiful and blooming from late March to November, which is really a feat in zone 5.

It was a peaceful location and I was grateful for the space to be able to grow fresh strawberries and veggies and to be able to play in the dirt. A statue of Jesus blesses all who enter the grounds.  On the other side of the gardens was a labyrinth people would come and walk through on occasion.

An Amazing Urban Oasis

Those gardens are an amazing urban oasis. With a beautiful stand of pine trees blocking the view to adjacent townhomes, the fragrant lilac bushes lining the parking lot and the expanse of athletic field taking up the west end of the property, the city always felt far away when I was there.

The city melts away when you're here.

The city melts away when you're here.

In the four seasons I was there, I

  • resurrected two flower beds: moved some perennials, planted some more and added annuals – mostly zinnias – to fill the holes.
  • built a VERY rudimentary compost bin with metal stakes and chicken wire. I let a couple of climbing weeds camouflage it.
  • added a strawberry patch to one end of a flower bed.
  • got to know some of my gardening neighbors; a couple of them were nuns or worked for the school, most of us were from around the community.
  • grew enough veggies to feed myself and many of my friends and neighbors: lots of greens,  tomatoes, beans, lettuce, carrots, squash, cucumbers, etc.
  • made catmint mice for my kitties.
  • created an aesthetic space out of a pile of weeds.
  • meditated and communed with my higher power regularly.

It’s  Tough Letting Go

But now I’m in Wisconsin and get to start the process all over again. Thing is, I was still holding on to my old patch emotionally. I hadn’t called Sister Rita yet to let her know I wouldn’t be back this spring; I hadn’t called my neighbor Curtis, who let me store my wheelbarrow in his fenced-in patch, to tell him he could have the barrow. I was still working out plans in my head for where the tomatoes should go this year.

How Twitter Saved the Day

And then I met @jenofchicago. On Twitter. (If you don’t know what Twitter is, Google it and then come join us.) I checked out her profile and saw that she had tweeted only three times in almost 3 years! I’m not sure how to go about verifying this, but I think it must be some kind of Twitter record! She tweeted once in July ’07, once in July ’08 and not again until Feb. 9 this year. And she was asking for help.

Because I’m a strong believer in paying it forward in all things Twitter (I have gotten a LOT of help from peeps when I was floundering around in the tweetstream of this exciting new social medium), I sent her some links and made a few suggestions of people to follow and figured that would be it.

Making a Personal Connection

Next thing I know, Jen sent me a personal e-mail thanking me for my help and asking me if my garden patch was behind a particular school (which it was). She mentioned that she sometimes walks the labyrinth there and had always wondered about the gardens.

I was floored! I mean, I’ve tweeted with people from all walks of life living all over the world – but this was the first time I met somebody on Twitter who had actually been to my garden patch (or at least to the same location). How cool is that?!

We e-mailed back and forth a couple of times and now – voila! – @jenofchicago is the proud mama of my strawberry patch – and perennials and anything else she wants to grow there!

Although she and I have never met face to face, because we met on Twitter it almost feels as if my beloved patch is staying in the family. Weird, maybe, but it’s how I feel. Like, we made this connection at a very real and human level through cyberspace, so she’s no longer some complete stranger who may go and and undo all the work I’ve done just ’cause she doesn’t know any better. I will actually be able to tell Jen what’s planted where (the daffodils should start sprouting by the end of March, but the stargazer lilies won’t make their presence known until late April or May) and she won’t have to start from scratch!

The Power of Twitter

twitter4Anybody who follows me on Twitter knows by now that I am a huge fan. If I could make a living on Twitter, I’d be tweeting my little heart out all day! Suffice it to say that I have met the most wonderfully diverse bunch of gardeners on Twitter through my @FamerPhoebe account. I learn something new every day and always find something to laugh about. I’ve even met another organic gardener named Phoebe on Twitter! (She’s in New York.) But serendipitously finding on Twitter such a wonderful new caretaker for my little garden patch I’d worked so hard on and with such love for the past four seasons – well, that’s just plain special.

I hope you will follow my new Twitter buddy @jenofchicago and congratulate her on her new garden patch!

For the Love of Organic Strawberries – Part 2

Last time I talked about what kind of soil to plant strawberries in and which types to choose. Part 2 covers how and when to plant strawberries and what to do with them once they’re in the ground—other than harvesting and piggin’ out on them, of course.freshstrawberries1

Basic Planting Instructions

The most economical way to purchase strawberry plants is to get bundles of bare-root plants. They are more fragile than if you get them in little 3-inch starter pots, but it will save you money. Just remember to time your purchase to arrive within a day or two of planting and you should be fine. If you don’t plant them right away, make sure to keep the rootballs moist; you can wrap them in wet newspaper and keep the paper moist until ready to plant.

Most experts say to wait until an overcast day and to plant in the mid-morning. In northern climates—zone 5 and below—strawberries should be planted from late March to April. In zones 6 and up, strawberries should be planted in the fall for a spring harvest.

If you’re working with bare-root plants, put them in a bucket of water up to just below the crowns and let them soak for an hour. In the meantime, you can start digging your holes, which should be slightly larger than the rootball. It’s important that your baby strawberry plants are set in at the right depth: too low and they may get crown rot; too high and the roots may dry out and the plants won’t thrive. See Figure 1 for an illustration of the correct planting depth.

planting-depth

Illustration showing the correct depth to plant strawberries

Which Planting Configuration Should You Use?

There are a few different ways to plant strawberries: matted rows, spaced rows and hills. Here are several things to consider when deciding which system is best for you, your plants and your garden.

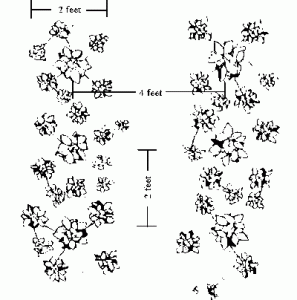
Matted rows. The matted row planting system is the most popular method for growing June-bearing varieties. The plants are set 18–30 inches apart in rows 3–4 feet apart. The runner plants are allowed to root freely to form a matted row about two feet wide. See Figure 2 for illustration.

straspcc

Example of the matted row planting system


Spaced rows. This system limits the number of daughter plants (i.e., runners) that grow from a mother plant. The mother plants are set 18–30 inches apart in rows 3–4 feet apart. The daughter plants are spaced to root no closer than 4 inches apart. All other runners are removed. This is probably the most labor intensive planting method but can result in higher yields, larger berries and fewer disease problems.

Hills. The hill system is considered the best method for growing everbearing and day-neutral cultivars and when drainage is a problem. Unlike squash hills, strawberry hills should be about 6–8 inches high and 2 feet wide. Two or three plants are spaced 10–12 inches apart in each hill and hills can be staggered about 12 inches apart. All runners are removed from the everbearers and day-neutrals so that only the original mother plant is left to grow. Removing the runners enables the mother plant to develop numerous crowns and more flower stalks.

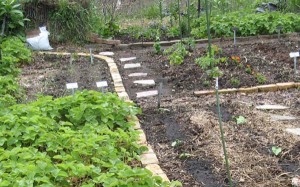
How I did it. I chose to plant June-bearing strawberries; therefore, I used a modified matted row system. Because space was limited, my rows were only about 3 feet apart and plants were only about 18 inches apart within the rows. I had so many plants left over I started a second patch along the east border of my garden, next to my neighbor’s hostas. Even so, I STILL had leftover plants, which I gave away to another one of my gardening neighbors. Lesson learned: Be realistic about space constraints; no matter how much I wanted them to, I was not going to fit 20 strawberry plants in a 4 x 4 foot patch.

 I had too many plants (top right) for primary patch, so I made a second one! (bottom left)

I had too many plants (top right) for primary patch, so I made a second one! (bottom left)

Caring for Your Strawberry Patch

So we’ve located a good spot with plenty of sun and adequate drainage, prepared the patch by weeding and amending the soil with lots of rich organic matter. We’ve decided which kinds of strawberries to plant, settled on the best system—matted row, spaced row or hills—dug the holes and put those babies in the ground, firming the soil around each plant and making sure the soil was just below the crown and completely covering the roots. After watering thoroughly, we get to take a breather and enjoy our handiwork. But not for long; there’s more work to be done.

Mulch. Unlike garden favorites such as tomatoes and peppers, strawberries like cool, moist soil. Therefore, they can be mulched almost from day one. A thick layer of straw between rows and plants will keep weeds down and the soil cool. Pine needles also make a great mulch additive.

Remove blossoms. Pinch off any blossoms that appear the first year that you plant June-bearers. This will encourage the plants to grow vigorously and produce more runners. The payoff comes the following season when your patch will be bursting with big, juicy strawberries!

Maya loves fresh strawberries! Photo by Sam Pullara

Maya loves fresh strawberries! Photo by Sam Pullara

Everbearing varieties will produce two or three harvests throughout the growing season and will produce a full crop the first season. They do not make many runners. Day-neutral strawberries will produce throughout the growing season and also offer few runners. Experts say that buds should be removed the first 4–6 weeks after planting to help establish healthy plant and root growth.

Water. It’s important to keep your patch watered—especially when producing. Strawberries have a shallow root system and require a good inch of water per week. Soaker hoses under the mulch are ideal. I used a wand at the end of a hose and they did fine—as long as the leaves have enough time to dry before dark.

Fertilize and mulch again. Remove runners on the everbearers and day-neutrals and enjoy the harvest the first season. You can sidedress between harvests with well-decomposed compost. Simply move the mulch out of the way, pull up the stray weeds that are trying to gain a foothold, add a couple of inches of compost, being careful that it does not come in direct contact with the plants, and replace the mulch. It doesn’t hurt to sidedress the June-bearers in the early fall and mulch everything heavily (4–6 inches) with straw before the first frost.

How I did it. Exactly as described above: I mulched, pinched blossoms, sidedressed and mulched again. My own compost pile wasn’t ready that first season so I used organic mushroom compost in a bag. I didn’t have to do much weeding because I tend to lay down the straw mulch pretty thick. By the third year after planting I had a bumper crop of organically grown strawberries as big and as beautiful as you could find in any grocery store—but much healthier and better-tasting. With my next garden, I am going to include day-neutrals and have two strawberry patches. After researching and preparing this article I’m convinced that having berries the first season is a nice trade-off for smaller fruit.

Renovation

This section is from the University of Illinois Extension site; I have never mowed my strawberry patch, but I’ve heard it’s a good practice; unless, of course, you planted your strawberries in hills, in which case a weed whacker might serve the same purpose.

In order to ensure good fruit production, June-bearing strawberries grown in the matted row system should be renovated every year right after harvest. A strawberry patch will continue to be productive for 3–5 years as long as the patch is maintained. The first step in the renovation process is to mow the old foliage with a mower, cutting off the leaves about one inch above the crowns. Rake the leaves and if disease-free, compost or incorporate into the soil. Narrow the rows to 6–12 inches wide by spading, hoeing or rototilling. Remove all weeds. Thin the plants in the narrowed row to 4–6 inches between plants. Water with 1 inch of water per week to promote growth and to make new runners for next year’s crop (http://urbanext.illinois.edu/strawberries/growing.html).

Online Resources

AllAboutStuff.com: When, Where and How to Plant Strawberries

Iowa State University Extension: Planting Strawberries in the Home Garden

South Dakota State University Extension: Strawberries in South Dakota

Thegardenhelper.com: How to Grow Sweet, Delicious Strawberries

University of Illinois Extension: Growing Strawberries

University of Illinois Extension: Time to Plant Strawberries

Home Vegetable Gardening – Chapter 2

Home Vegetable Gardening by F.F. Rockwell (original copyright 1911) is a rare gem that looks at how people in the U.S. gardened – and lived – about 100 years ago.  It is priceless Americana that shows how far we have come socially and environmentally (the poisons that were commonly used back then make me shudder – most of them are banned for use as pesticides and herbicides in the U.S. today, thank God) at the same time how some things remain the same. (The author writes in the preface about how having a backyard garden is a great antidote to “high prices” – at a time when a loaf of bread cost about a nickel.

The following excerpt about choosing just the right spot for your new garden is as relevant today – except for the part about making sure it is a suitable location for a horse-drawn plow to be able to turn around – as when it was written in 1911.

Home Vegetable Gardening is a public domain book, meaning that nobody owns a U.S. copyright. I thought it might be fun to post occasional excerpts from the book here, starting with chapter 1. I’d love to know what you think!

**********************

Home Vegetable Gardening
F.F. Rockwell
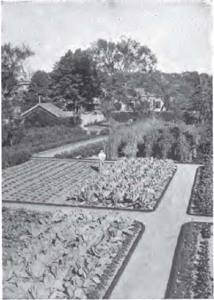
Home Vegetable Gardening Inside Front Cover

Home Vegetable Gardening Inside Front Cover

CHAPTER II

Requisites of the Home Vegetable Garden

In deciding upon the site for the home vegetable garden it is well to dispose once and for all of the old idea that the garden “patch” must be an ugly spot in the home surroundings. If thoughtfully planned, carefully planted and thoroughly cared for, it may be made a beautiful and harmonious feature of the general scheme, lending a touch of comfortable homeliness that no shrubs, borders, or beds can ever produce.

With this fact in mind we will not feel restricted to any part of the premises merely because it is out of sight behind the barn or garage. In the average moderate-sized place there will not be much choice as to land. It will be necessary to take what is to be had and then do the very best that can be done with it. But there will probably be a good deal of choice as to, first, exposure, and second, convenience. Other things being equal, select a spot near at hand, easy of access. It may seem that a difference of only a few hundred yards will mean nothing, but if one is depending largely upon spare moments for working in and for watching the garden—and in the growing of many vegetables the latter is almost as important as the former—this matter of convenient access will be of much greater importance than is likely to be at first recognized. Not until you have had to make a dozen time-wasting trips for forgotten seeds or tools, or gotten your feet soaking wet by going out through the dew-drenched grass, will you realize fully what this may mean.

EXPOSURE

But the thing of first importance to consider in picking out the spot that is to yield you happiness and delicious vegetables all summer, or even for many years, is the exposure. Pick out the “earliest” spot you can find—a plot sloping a little to the south or east, that seems to catch sunshine early and hold it late, and that seems to be out of the direct path of the chilling north and northeast winds. If a building, or even an old fence, protects it from this direction, your garden will be helped along wonderfully, for an early start is a great big factor toward success. If it is not already protected, a board fence, or a hedge of some low-growing shrubs or young evergreens, will add very greatly to its usefulness. The importance of having such a protection or shelter is altogether underestimated by the amateur.

THE SOIL

The chances are that you will not find a spot of ideal garden soil ready for use anywhere upon your place. But all except the very worst of soils can be brought up to a very high degree of productiveness—especially such small areas as home vegetable gardens require. Large tracts of soil that are almost pure sand, and others so heavy and mucky that for centuries they lay uncultivated, have frequently been brought, in the course of only a few years, to where they yield annually tremendous crops on a commercial basis. So do not be discouraged about your soil. Proper treatment of it is much more important, and a gardenpatch of average run-down—or “never-brought-up” soil—will produce much more for the energetic and careful gardener than the richest spot will grow under average methods of cultivation.

The ideal garden soil is a “rich, sandy loam.” And the fact cannot be overemphasized that such soils usually are made, not found. Let us analyze that description a bit, for right here we come to the first of the four all-important factors of gardening—food. The others are cultivation, moisture and temperature. “Rich” in the gardener’s vocabulary means full of plant food; more than that—and this is a point of vital importance—it means full of plant food ready to be used at once, all prepared and spread out on the garden table, or rather in it, where growing things can at once make use of it; or what we term, in one word, “available” plant food. Practically no soils in long- inhabited communities remain naturally rich enough to produce big crops. They are made rich, or kept rich, in two ways; first, by cultivation, which helps to change the raw plant food stored in the soil into available forms; and second, by manuring or adding plant food to the soil from outside sources.

“Sandy” in the sense here used, means a soil containing enough particles of sand so that water will pass through it without leaving it pasty and sticky a few days after a rain; “light” enough, as it is called, so that a handful, under ordinary conditions, will crumble and fall apart readily after being pressed in the hand. It is not necessary that the soil be sandy in appearance, but it should be friable.

“Loam: a rich, friable soil,” says Webster. That hardly covers it, but it does describe it. It is soil in which the sand and clay are in proper proportions, so that neither greatly predominate, and usually dark in color, from cultivation and enrichment. Such a soil, even to the untrained eye, just naturally looks as if it would grow things. It is remarkable how quickly the whole physical appearance of a piece of well cultivated ground will change. An instance came under my notice last fall in one of my fields, where a strip containing an acre had been two years in onions, and a little piece jutting off from the middle of this had been prepared for them just one season. The rest had not received any extra manuring or cultivation. When the field was plowed up in the fall, all three sections were as distinctly noticeable as though separated by a fence. And I know that next spring’s crop of rye, before it is plowed under, will show the lines of demarcation just as plainly.

This, then, will give you an idea of a good garden soil. Perhaps in yours there will be too much sand, or too much clay. That will be a disadvantage, but one which energy and perseverance will soon overcome to a great extent—by what methods may be learned in Chapter VI.

DRAINAGE

There is, however, one other thing you must look out for in selecting your garden site, and that is drainage. Dig down eight or twelve inches after you have picked out a favorable spot, and examine the sub-soil. This is the second strata, usually of different texture and color from the rich surface soil, and harder than it. If you find a sandy or gravelly bed, no matter how yellow and poor it looks, you have chosen the right spot. But if it be a stiff, heavy clay, especially a blue clay, you will have either to drain it or be content with a very late garden—that is, unless you are at the top of a knoll or on a slope. Chapter VI contains further suggestions in regard to this problem.

SOIL ANTECEDENTS

There was a further reason for, mentioning that strip of onion ground. It is a very practical illustration of what last year’s handling of the soil means to this year’s garden. If you can pick out a spot, even if it is not the most desirable in other ways, that has been well enriched or cultivated for a year or two previous, take that for this year’s garden. And in the meantime have the spot on which you intend to make your permanent vegetable garden thoroughly “fitted,” and grow there this year a crop of potatoes or sweet corn, as suggested in Chapter VIII. Then next year you will have conditions just right to give your vegetables a great start.

OTHER CONSIDERATIONS

There are other things of minor importance but worth considering, such as the shape of your garden plot, for instance. The more nearly rectangular, the more convenient it will be to work and the more easily kept clean and neat. Have it large enough, or at least open on two ends, so that a horse can be used in plowing and harrowing. And if by any means you can have it within reach of an adequate supply of water, that will be a tremendous help in seasons of protracted drought. Then again, if you have ground enough, lay off two plots so that you can take advantage of the practice of rotation, alternating grass, potatoes or corn with the vegetable garden. Of course it is possible to practice crop rotation to some extent within the limits of even the small vegetable garden, but it will be much better, if possible, to rotate the entire garden-patch.

All these things, then, one has to keep in mind in picking the spot best suited for the home vegetable garden. It should be, if possible, of convenient access; it should have a warm exposure and be well enriched, well worked-up soil, not too light nor too heavy, and by all means well drained. If it has been thoroughly cultivated for a year or two previous, so much the better. If it is near a supply of water, so situated that it can be at least plowed and harrowed with a horse, and large enough to allow the garden proper to be shifted every other year or two, still more the better.

Fill all of these requirements that you can, and then by taking full advantage of the advantages you have, you can discount the disadvantages. After all it is careful, persistent work, more than natural advantages, that will tell the story; and a good garden does not grow—it is made.

Tip of the Week: For the Love of Organic Strawberries – Part 1

Whether you choose early-, mid- or late-season June-bearers, the smaller but more frequent everbearers, or the young upstart day-neutrals, a freshly picked, perfectly ripened homegrown strawberry does not exist in the same galaxy as its cardboard cutout, dry-as-sawdust store-bought brethren, let alone on the same planet.

Here are some tips on how you can grow the biggest, most juicy and flavorful strawberries ever—without using harmful pesticides or other chemicals!

**********************
When I read a few years ago that conventionally grown strawberries retained more toxic pesticide residues than just about any other fruit, I knew I had to start growing my own—because I loooooove strawberries. With the cost of organic strawberries—in season—hovering around $3/pint (I can’t even imagine what they cost now), I was eating a lot of pesticide-residue-riddled berries.

Not anymore.

The 3S’s: Sun, Soil and Regular Sousing
Although strawberries are easy to grow, these highly versatile nectars of the gardening gods require an abundance of the basic elements of photosynthetic life: lots of sun (at least 6 hours of direct sun a day), slightly acidic soil (between 5.5 and 6.5 pH, according to eHow.com) that is rich in organic matter and allows for good drainage, and about an inch of water per week—especially when the fruit is developing.

I’ve also read that, when choosing where to put the patch, to be careful to avoid planting strawberries where tomatoes, potatoes, peppers, eggplants or raspberries have been grown for the past several years. These plants can harbor verticillium wilt, which is particularly hazardous to strawberries. Every university extension site I visited, with the exception of Ohio State’s, listed chemical solutions for treating this pervasive fungus. Based on what I’ve read, the best organic solution is prevention.

Good drainage is important because strawberries have shallow root systems. They need plenty of water for big, juicy berries but cannot abide sitting in standing water and will rot. Some experts recommend planting strawberries in hills or in raised beds loaded with lots of well-composted organic materials.

How I did it. Other than the advice not to plant strawberries where tomatoes had been, I didn’t really know any of this stuff when I first planted my strawberries. I picked a section of a dormant flower bed for my primary patch. The fall before planting I pulled up all the weeds and turned the soil, which had been sitting fallow for at least a year before I secured my patch at the community garden. The nun who had tended the garden of which my patch was only about a third was very ill and couldn’t keep up with her garden. She died the winter before I began leaving voicemails for Sister Rita, pestering her for a veggie patch of my own.

My first fall at the patch I dumped a couple of 40 lb bags of organic mushroom compost on the patch (my own newly established compost pile wasn’t “ripe” yet) and worked it lightly into the soil. And that was pretty much it.

Poor quality photo of my strawberry patch a couple of months after planting (July 2006).

Poor quality photo of my strawberry patch a couple of months after planting (July 2006).

Everbearing, June-bearing—or Day-neutral?
When it came time to actually pick out what type of strawberries I wanted to grow, I was faced with an overwhelming array of choices. Because I had spent a couple of summers and many, many weekends working for my dad on his organic farm in southwestern Michigan, I knew there were everbearing strawberries, which, under the right conditions, would produce throughout the growing season, and June-bearing strawberries, which, like the name implies, bear fruit just once per year in late spring to early summer.

What I didn’t know was that within each broad category were a number of different choices: For instance, June-bearers have early-, mid- and late-season varieties. I suppose an ambitious gardener—or a strawberry addict—could cultivate all three to keep fresh strawberries on the table for a couple of months rather than the typical 3-week production cycle.

Everbearers produce smaller berries a couple of times a year (spring and fall) and don’t shoot off as many runners (picture spider plant offshoots that, instead of dangling from a hanging basket, spread along the ground, and then start establishing new roots once far enough away from the mother plant) as June-bearers.

Then there’s a newer cultivar I knew nothing about called the day-neutral. According to the Purdue University Extension office’s Yard and Garden News Web page, day-neutrals are a true everbearer and can produce fruit throughout the growing season, as long as it doesn’t get too hot.

May 2007 - First full season and both patches (main patch is at the top right of photo) are robust and setting fruit!

May 2007 - First full season and both patches (main patch is at the top right of photo) are robust and setting fruit!

How I did it. Although the space allotted for my strawberry patch was pretty small (about 4’ x 4’) I decided to go with the June-bearers. Aesthetics are important to me; I wanted to grow big, juicy, luscious strawberries, not the puny (to me) everbearers my dad grew on his farm. I figured, so what if I could enjoy them fresh for only a few weeks? I could (and did) enjoy the frozen berries I put up for months!

By the third season I was very pleased with my choice. My strawberries, picked ripe, not green and spiny like the flavorless store-bought berries, rivaled what you could buy at Jewel or Safeway in size and had irresistibly incomparable flavor. My mouth is watering just thinking about them. I can’t wait for spring!

On the other hand, although day-neutrals can produce throughout the growing season, they practically have to be treated as annuals, which means you have to replant them every year.

Next week I will finish my ode to strawberries with tips on their planting and care that will assure you of the most delicious strawberries you have ever tasted.

Online Resources
About.com: How to Grow Organic Strawberries
eHow.com: How to Grow Organic Strawberries
Gardening-Guides.com: How to Grow Strawberries
Purdue University Extension: Preparing Strawberry Patch
RusticGirls.com: Grow Your Own Strawberries
University of Illinois Extension: Time to Plant Strawberries

What Are Your Twitter Followers All About? New Tool Spells It Out

I just learned about this new Twitter tool:  TwitterSheep.com. Although I’m not crazy about the name – my peeps are NOT sheep! – I LOVED the result. It’s a word cloud composed of keywords from the bios of my gardening buddies who follow me on Twitter! Pretty cool, eh? I am glad to see we’re into food, life, love, writing and green organic gardening! The cloud’s a little light on dogs, though. And kitties didn’t even make the cut! Oh well, it’s a work in progress, right?

What do your followers represent?

FarmerPhoebe's Twitter Cloud

FarmerPhoebe's Twitter Cloud

Tip of the Week: A Slugfest Smackdown!

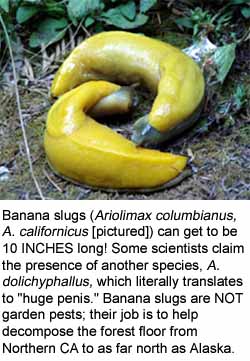
banana_slugs*WARNING* Gross pictures of slimy slugs are included. Not recommended for the squeamish.
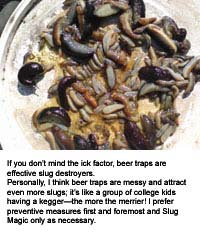
Just so you know, I am not a violent person. I’m all about live and let live–except when it comes to slugs.

Before I jump into my sure-fire organic controls for slugs, a quick qualifier: My gardening experience is limited mostly to the Midwest zones 4-5. Although I woke up one morning to find a banana slug the size of, well, a frickin’ banana! sliming its way up the side of my tent while camping in Northern California, my gardening experience with slugs is limited to the smaller, snot-colored varieties–like the ones that destroyed three entire plantings of marigolds in my garden patch one spring.

Slugs thrive in cool, moist environments and love feasting on stuff like lettuce, ripe strawberries and marigolds. I had actually never had a problem with slugs until that fateful spring two seasons ago.

I planted marigolds and mulched my tomatoes two weeks earlier than I normally do (mid-May, instead of waiting until after Memorial Day weekend). And I wound up paying the price in marigolds.

But I learned two valuable lessons that year, as well: (1) Wait until the soil has warmed up sufficiently before mulching and (2) don’t plant the 8-pack flats of marigolds before Memorial Day; they don’t stand a chance against those voraciously slimy eaters.

I tried the following traditional organic methods for slug abatement:

beer_trap

  • Beer traps. I used wide-mouthed jar lids to set the traps and was careful to make sure the lips were at least 1/3 inch above ground so that once the slimy creatures joined the  beer fest, they couldn’t get back out. I don’t drink, so I didn’t want to waste money on some fancy beer; if I remember correctly a 40 oz bottle of Old Style was the cheapest I could find without springing for an entire 6-pack. I’ve read you can also mix water, sugar and yeast for the same slug-slurping effect. Haven’t tried it, myself. The beer was good bait. The traps caught quite a few slugs–but did not prevent them from continuing to eat my poor marigolds!
  • Copper. I read in one of my organic gardening books that placing bands of copper around the base of young plants would act as a deterrent for slugs. So I went to Home Depot and found a small roll of copper something or other that was about a ½ inch wide. For the life of me I cannot remember what it’s supposed to be used for; I think I found it in the plumbing section. I diligently placed little copper collars around the young broccoli and cabbage plants–and around my second planting of marigolds. Broccoli and cabbage did fine; the marigolds continued to get devoured.

Slug Magic Did the Trick
At my wit’s end–and on my third planting of marigolds, which I plant every year as a companion to tomatoes because they repel tomato hornworms (those hard-to-spot giant green caterpillars that feast on the underside of tomato plant leaves) and aphids–on the advice of an organic gardening friend, I bought a bottle of Slug Magic pellets. Ya’ just sprinkle them around the base of the plants, the slugs ingest them, and over the course of 3-6 days puff up and die. Works like a charm. The pellets are considered organic because they are a biological control, do not harm other beneficial bugs or animals, and are biodegradable.

An Ounce of Prevention…
I still swear by waiting until the soil has warmed up before mulching and not planting too early. When I do that, I have no problem with slugs. But if you must, iron phosphate, the slug-destroying ingredient in Slug Magic, is a sure-fire winner; and it truly does work like magic! Amazon carries it if you want to order online. Otherwise, you can find it at most gardening centers that carry organic products.

NEXT WEEK: Tip of the Week
For the Love of Strawberries
Simple Solutions for Boosting Size and Yield!

New Use for 4 mil Black Plastic

Because I used to live in a zone 5 climate (now I’m in zone 4), I use black plastic to warm up my tomato and pepper beds in the spring. I keep a couple of sheets of 4-mm-thick black plastic in the Tool Shed (aka my car).

After amending the soil, I anchor the plastic with bricks, or whatever else is lying around, on top of the beds where I’ll transplant my heat-loving plants and let it sit there for a couple of weeks. We all know black absorbs the sun, so it helps to accelerate the sun’s warming effects AND smothers pesky weed seeds before they have much of a chance to take off.

4 mil black plastic is incredibly versatile!

4 mil black plastic is incredibly versatile!

I know 4 mil black plastic has a variety of other uses as well, such as makeshift rain poncho, wood chip carrier, ground cover for a picnic blanket, and most recently–a shower curtain!

I was 3 days at my new place in freezing cold Wisconsin and hadn’t yet ventured out to find a Target to stock up on the typical new home stuff: wastebaskets, shower caddy, shower curtain, you know, the usual stuff. I was dying for a shower but didn’t want water to spray all over, never even considered a bath (I’m just not much of a bath person) … what to do, what to do. Then it dawned on me that I still had some black plastic folded up neatly in the hatchback of my car! I draped it over the shower curtain rod and clipped it in place with a couple of binder clips at either end, rinsed last year’s dirt off of it, and it worked just fine! Best shower I’d had in a long time, as a matter of fact.

Rich Schefren, one of my small-business coaches, liked to remind us that entrepreneurs who were resourceful were often more successful than those who just looked for resources. I doubt he had 4 mil black plastic in mind when he said that.

My New Home in Wisconsin

See? It's not so bad.

See? It's not so bad.

First blog post from my new home in beautiful, freezing cold Wisconsin.

I saw the constellation Orion for the first time in I don’t know how long the other night. While walking Mickey down the middle of a quiet, snow-covered street, our breath puffing out like steam engines in the brilliantly crisp, sub-zero temperature air, I looked up at the sky—and saw stars! Orion stood low in the southern sky like he always does this time of year, arm pulled back taught on his bow, his belt hanging at a jaunty angle. I felt like a little kid who couldn’t wait to run home and tell mom about this amazing discovery. Instead, I smiled, yelled at Mickey to get out of the neighbor’s garbage, and hurried to get back to the house before my face fell off. Note to self: Find scarf—and get long underwear. B-r-r-r-r-r-r-r-r.

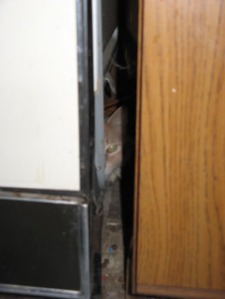
Riley's hidey hole. Can you see him peeking out?

Riley's hidey hole. Can you see him peeking out?

Shabby, But Habitable
Our new home is shabby, but habitable. The lights, heat, and plumbing all work, and I get to park my car 10 feet from the back door (which made unloading it a breeze). The refrigerator is old, dirty, and not level, a couple of baseboards are missing from under the mostly crooked kitchen cabinets, and there’s a wide open space between the dishwasher (don’t ask about the dishwasher—it’s definitely a job for duct tape) and a wall that looks like a small set of drawers should reside. My cat Riley immediately claimed the space behind the dishwasher as his new hidey hole.

Although the neighborhood is crisp and clean and everybody had snow-blown or shoveled their sidewalks (except for my house), once inside I felt like I’d landed in the low-rent district of a college town. How a drunken college kid managed to punch a hole in the wall just outside the bathroom at knee level I will never know.

Almost Would Have Settled for a Shack
Nevertheless, when we first pulled in Saturday night after a harrowing drive through an ice storm, I was so happy to be ANYWHERE at that point I would have been grateful for a hovel with an outhouse. Although my little two-bedroom house is several notches above a hovel, it’s a long shot from anyone’s idea of a dream home. The former tenant, who is selling me her washer & dryer for $50, made a valiant effort to clean the place and make it look presentable.

Considering that I rented this place sight unseen from a Craigslist ad, I suppose it could’ve been a lot worse. It will do for now as I get my bearings in this new foreign land of ice fishing and snowmobiles.

12-Step Program for Worm Smokers?

I’m concerned one of my gardening buddies has a problem. Amanda Thomsen, newest blogger for Horticulture magazine (you can follow her on Twitter at @kissmyaster), posted the following: “I covered up the vermiculture smell with incense-now I smell like I’ve been smoking worms and I’m trying to hide it.”

Apparently, Amanda separated out some worms from her worm bin to give to a friend who was starting his or her own vermicompost. Amanda’s husband commented that she smelled “worm-y,” so Amanda lit some incense.

Concerned for my friend’s well-being, I responded promptly: “You do know that smoking worms leads to harder stuff; next thing you know, you’ll be popping rolly pollies (aka pill bugs).”

If anybody knows of a 12-step program for gardening junkies, please send me (@FarmerPhoebe) or @kissmyaster the link right away. Lives hang in the balance.

Home Vegetable Gardening – Ch. 1

Home Vegetable Gardening by F.F. Rockwell (original copyright 1911) is a rare gem that looks at how people in the U.S. gardened – and lived – about 100 years ago.  It is priceless Americana that shows how far we have come socially (note the sentence in the excerpt below about women and smoking) and environmentally (the poisons that were commonly used back then make me shudder – most of them are banned for use as pesticides and herbicides in the U.S. today, thank God) at the same time how some things remain the same. (The author writes in the preface about how having a backyard garden is a great antidote to “high prices” – at a time when a loaf of bread cost about a nickel.

Home Vegetable Gardening is a public domain book, meaning that nobody owns a U.S. copyright. I thought it might be fun to post occasional excerpts from the book here, starting with chapter 1. I’d love to know what you think!

**********************

Home Vegetable Gardening
F.F. Rockwell

Home Vegetable Gardening inside front cover

Home Vegetable Gardening inside front cover

CHAPTER I
Why You Should Garden
There are more reasons today than ever before why the owner of a small place should have his, or her, own vegetable garden. The days of home weaving, home cheese-making, home meat-packing, are gone. With a thousand and one other things that used to be made or done at home, they have left the fireside and followed the factory chimney. These things could be turned over to machinery. The growing of vegetables cannot be so disposed of. Garden tools have been improved, but they are still the same old one-man affairs—doing one thing, one row at a time. Labor is still the big factor—and that, taken in combination with the cost of transporting and handling such perishable stuff as garden produce, explains why the home gardener can grow his own vegetables at less expense than he can buy them. That is a good fact to remember.

But after all, I doubt if most of us will look at the matter only after
consulting the columns of the household ledger. The big thing, the salient feature of home gardening is not that we may get our vegetables ten per cent cheaper, but that we can have them one hundred per cent better. Even the longkeeping sorts, like squash, potatoes and onions, are very perceptibly more delicious right from the home garden, fresh from the vines or the ground; but when it comes to peas, and corn, and lettuce—well, there is absolutely nothing to compare with the home garden ones, gathered fresh, in the early slanting sunlight, still gemmed with dew, still crisp and tender and juicy, ready to carry every atom of savory quality, without loss, to the dining table. Stale, flat and unprofitable indeed, after these have once been tasted, seem the limp, travelweary, dusty things that are jounced around to us in the butcher’s cart and the grocery wagon. It is not in price alone that home gardening pays. There is another point: the market gardener has to grow the things that give the biggest yield. He has to sacrifice quality to quantity. You do not. One cannot buy Golden Bantam corn, or Mignonette lettuce, or Gradus peas in most markets. They are top quality, but they do not fill the market crate enough times to the row to pay the commercial grower. If you cannot afford to keep a professional gardener there is only one way to have the best vegetables—grow your own!

And this brings us to the third, and what may be the most important
reason why you should garden. It is the cheapest, healthiest, keenest pleasure there is. Give me a sunny garden patch in the golden springtime, when the trees are picking out their new gowns, in all the various self-colored delicate grays and greens—strange how beautiful they are, in the same old unchanging styles, isn’t it?—give me seeds to watch as they find the light, plants to tend as they take hold in the fine, loose, rich soil, and you may have the other sports. And when you have grown tired of their monotony, come back in summer to even the smallest garden, and you will find in it, every day, a new problem to be solved, a new campaign to be carried out, a new victory to win.

Better food, better health, better living—all these the home garden offers you in abundance. And the price is only the price of every worthwhile thing—honest, cheerful patient work.

But enough for now of the dream garden. Put down your book. Put on
your old togs, light your pipe—some kind-hearted humanitarian should devise for women such a kindly and comforting vice as smoking—and let’s go outdoors and look the place over, and pick out the best spot for that garden-patch of yours.

How to Make a Catmint ‘Mouse’

You know how you can go out and buy an expensive toy for your cats and they wind up preferring to play with the bag (or box) the toy came in? I’ve created a simple toy my kitties never seem to tire of: catmint mouse. If you have more than one cat (I have two) make sure that each one gets their own to play with; my Riley can get very punky about sharing his.

If you don’t have catmint in your garden, no doubt one of your neighbors does. It is prolific here in the Midwest. I keep trying to give it away, but many of my gardening neighbors see how fast and wide it grows and don’t want anything to do with it. Personally I love catmint for those reasons and because it blooms almost all summer. The bonus is that my kitties go ga-ga over it, fresh or dried.

Catmint (Nepeta faassenii) is a hardy perennial

Catmint (Nepeta faassenii) is a hardy perennial

Catmint (Nepeta faassenii) and catnip (N. cataria) are in the same mint family. It is a hardy perennial (zones 4-8) that thrives on neglect. Because it tries to take over my perennial bed each year, I cut it back at least once per season. It has a wonderful, almost woodsy, aroma. My cats love this stuff.

Dry It Out First
So get yourself a big bundle of catmint. I usually wait until mid-August, well after its peak blooming season. Dry it. When I had a gas oven with a pilot light on, I’d lay it out on cookie sheets for a couple of days. This year, I hung it outside under the eaves of my back porch.

Once it’s dried, I strip the stems of foliage, trying not to crush the flowers or leaves too much, so my cats get the full benefit of doing it themselves.

Any Old Cotton Sock Will Do
I grab a couple of old cotton socks that no longer have a mate. I found the easiest method for stuffing the socks is to use the ring from wide mouthed quart canning jars. Stretch the sock opening over the ring all way to the heel. It’s really easy to stuff as much of your dried catmint into the sock as you want. Knot the sock just above the stuffing, so now the mouse has a little tail, and let your cat have at it!

Looks are deceiving. Riley may look relaxed but he'll pounce in a moment's notice!

I suppose the crafty, creative types would like to add eyes, whiskers, ears, and all, but I don’t. What my kitties love is the smell of catmint. They will wrestle with that little stuffed sock, roll on it, bat it around. My cat Maya has played with her sock for as long as 30 minutes at a time. She can’t seem to get enough of it.

**************
For more information about catmint, check out this article in About.com.

My First Garden

Just about anyone who came up through the U.S. public school system in the late ’60s to ’70s can relate to green bean seeds in Dixie cups, right? That little science experiment was the start of my lifelong passion for green and growing things.

My first solo attempt at gardening was when I was about 8 years old. I cleared a little patch of dirt and planted two small rows of popcorn kernels in the unkempt side yard on the south side of my parents’ suburban Chicago home. (Even back then I must have had some instinct about which side of the house was best for growing stuff.)

I took such good care of those little seeds. I watered and weeded and waited…and waited…and waited. I remember my excitement when I came home from summer camp that August, ’cause my waist-high corn plants were now taller than I was! And they had tassels and little ears forming on each stalk – just like the corn I’d seen in the fields all over the rural Midwest! I couldn’t wait to try the fruits of my labor, as it were.

What I didn’t know at the time was that popcorn seeds do not grow up to be sweet corn. I almost broke a tooth on that first raw bite.

Although disappointed that all my hard work did not produce the results I expected, the popcorn experiment did not keep me from pursuing my love for gardening. I guess it’s in my blood.


What Flower Are You?

Follow Me on Twitter

RSS Mother Earth News

  • An error has occurred; the feed is probably down. Try again later.
Support the Department of Peace banner- 150w
Add to Technorati Favorites
May 2024
S M T W T F S
 1234
567891011
12131415161718
19202122232425
262728293031